What is an Arduino Battery Tester?
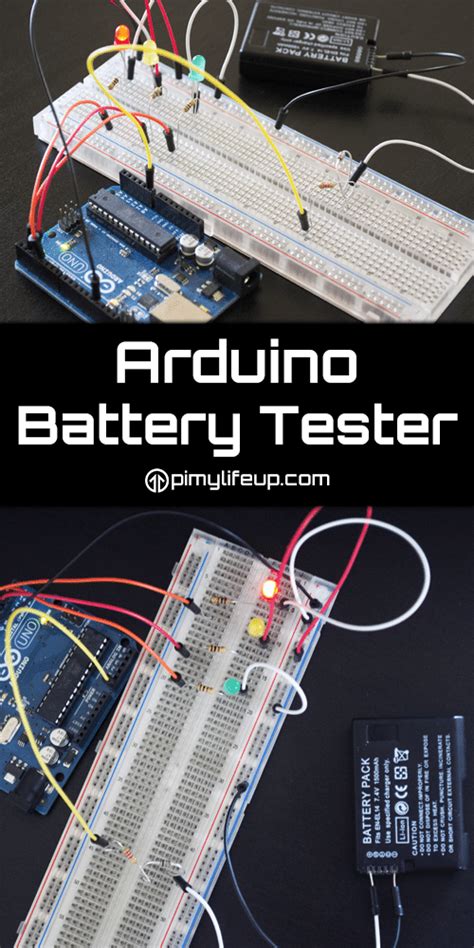
An Arduino Battery Tester is a device that measures the capacity of a battery using an Arduino Microcontroller. The tester works by discharging the battery at a constant current and measuring the time it takes for the battery to reach a certain voltage level. By knowing the discharge current and time, you can calculate the battery’s capacity in milliamp-hours (mAh).
Why Do You Need an Arduino Battery Tester?
There are several reasons why you might need an Arduino Battery Tester:
-
Determine Battery Health: Over time, batteries degrade and lose their capacity. An Arduino Battery Tester can help you determine the current health of a battery and whether it needs to be replaced.
-
Match Batteries: If you have multiple batteries, an Arduino Battery Tester can help you match batteries with similar capacities. This is important when using batteries in series or parallel, as mismatched capacities can lead to reduced performance and even damage to the batteries.
-
Verify Manufacturer Claims: Manufacturers often provide capacity ratings for their batteries, but these ratings may not always be accurate. An Arduino Battery Tester allows you to verify the actual capacity of a battery and ensure that it meets your requirements.
-
Save Money: Using an Arduino Battery Tester can help you save money in the long run. By identifying weak or damaged batteries early, you can avoid using them in projects and devices where they may cause problems or fail prematurely.

How Does an Arduino Battery Tester Work?
An Arduino Battery Tester consists of several components:
- Arduino Microcontroller
- Current Sense Resistor
- Voltage Divider
- LCD Display
- Pushbuttons
- Battery Holder
The basic principle behind an Arduino Battery Tester is to discharge the battery at a constant current and measure the time it takes for the battery to reach a certain voltage level. Here’s a step-by-step breakdown of how it works:
-
The battery is placed in the battery holder and connected to the Arduino through the current sense resistor and voltage divider.
-
The user selects the discharge current using the pushbuttons and LCD display. The discharge current is typically set to a fraction of the battery’s rated capacity (e.g., C/10 for a 1000mAh battery would be 100mA).
-
The Arduino begins discharging the battery at the selected current by turning on a transistor connected to the current sense resistor. The voltage across the current sense resistor is proportional to the discharge current.
-
The Arduino continuously measures the battery voltage using the voltage divider and analog input. When the battery voltage reaches a predetermined cutoff voltage (e.g., 2.8V for a lithium-ion battery), the discharge process is stopped.
-
The Arduino calculates the battery capacity by multiplying the discharge current by the discharge time and displays the result on the LCD.
Here’s a table summarizing the key components and their functions:
| Component | Function |
|---|---|
| Arduino Microcontroller | Controls the discharge process and measures voltage and current |
| Current Sense Resistor | Converts the discharge current to a voltage that can be measured by the Arduino |
| Voltage Divider | Reduces the battery voltage to a level that can be safely measured by the Arduino |
| LCD Display | Displays the discharge current, battery voltage, and calculated capacity |
| Pushbuttons | Allow the user to select the discharge current and start/stop the test |
| Battery Holder | Holds the battery and provides a secure connection to the tester |

Building an Arduino Battery Tester
Building an Arduino Battery Tester is a relatively simple project that can be completed in a few hours. Here’s a high-level overview of the steps involved:
-
Gather the necessary components (Arduino, current sense resistor, voltage divider, LCD display, pushbuttons, battery holder).
-
Connect the components according to the schematic diagram.
-
Write the Arduino code to control the discharge process and calculate the battery capacity.
-
Upload the code to the Arduino and test the tester with a known-good battery.
There are many online resources available that provide detailed instructions and code examples for building an Arduino Battery Tester. Some popular resources include:
- Arduino Battery Tester Tutorial by Instructables
- DIY Arduino Battery Tester by CircuitDigest
- Arduino Battery Capacity Tester by MakerPro

Interpreting Arduino Battery Tester Results
Once you’ve built your Arduino Battery Tester and tested a battery, you’ll need to interpret the results. The tester will display the battery capacity in milliamp-hours (mAh), which is a measure of the battery’s energy storage capacity.
Here’s a table showing some common battery capacities and their typical applications:
| Battery Capacity (mAh) | Typical Applications |
|---|---|
| 100-500 | Small electronics (e.g., watches, calculators) |
| 500-1000 | Portable electronics (e.g., headphones, remote controls) |
| 1000-3000 | Smartphones, tablets, handheld gaming devices |
| 3000-10000 | Laptops, power banks, drones |
| 10000+ | Electric vehicles, home energy storage systems |
It’s important to note that the actual capacity of a battery may be lower than its rated capacity due to factors such as age, temperature, and discharge rate. An Arduino Battery Tester can help you determine the actual capacity of a battery under real-world conditions.
FAQs
-
What types of batteries can an Arduino Battery Tester test?
An Arduino Battery Tester can test a wide range of battery types, including lithium-ion, lithium-polymer, NiMH, NiCd, and lead-acid batteries. However, the tester may need to be modified to accommodate different battery voltages and form factors. -
How accurate is an Arduino Battery Tester?
The accuracy of an Arduino Battery Tester depends on several factors, including the accuracy of the current sense resistor and voltage divider, the resolution of the Arduino’s analog inputs, and the calibration of the tester. With proper calibration, an Arduino Battery Tester can achieve an accuracy of within 5-10% of the battery’s actual capacity. -
Can an Arduino Battery Tester charge batteries?
No, an Arduino Battery Tester is designed to discharge batteries, not charge them. Charging batteries requires a separate circuit and safety considerations to prevent overcharging and other hazards. -
How long does it take to test a battery with an Arduino Battery Tester?
The time required to test a battery with an Arduino Battery Tester depends on the battery’s capacity and the selected discharge current. For example, testing a 1000mAh battery at a discharge current of 100mA would take approximately 10 hours. Testing larger batteries or using lower discharge currents will take longer. -
Can an Arduino Battery Tester be used for other purposes?
While an Arduino Battery Tester is primarily designed for testing batteries, the basic principles of current and voltage measurement can be applied to other applications. For example, an Arduino Battery Tester could be modified to measure the power consumption of a device or to monitor the output of a solar panel.
Conclusion
An Arduino Battery Tester is a valuable tool for anyone who works with batteries, whether as a hobby or professionally. By accurately measuring battery capacity, an Arduino Battery Tester can help you determine battery health, match batteries for optimal performance, verify manufacturer claims, and save money in the long run.
Building an Arduino Battery Tester is a relatively simple project that can be completed with readily available components and online resources. Once built, an Arduino Battery Tester can provide accurate and reliable measurements of battery capacity under real-world conditions.
Whether you’re a hobbyist building a custom electronics project or a professional designing a new battery-powered device, an Arduino Battery Tester is an essential tool to have in your toolkit. With its ability to quickly and accurately measure battery capacity, an Arduino Battery Tester can help you make informed decisions about battery selection and usage, ultimately leading to better performance and longer battery life.


Leave a Reply