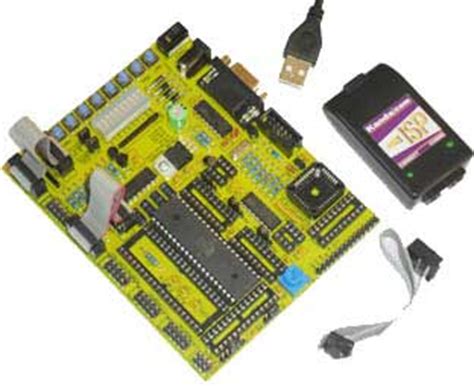
What is the STK500?
The STK500 is a development board designed by Atmel (now part of Microchip Technology) specifically for programming and debugging their AVR microcontrollers. It features a built-in in-system programmer (ISP), which allows you to program AVR chips directly on the board without the need for an external programmer.
The board is compatible with a wide range of AVR microcontrollers, including the popular ATmega series (ATmega8, ATmega16, ATmega32, ATmega128, etc.) and the smaller ATtiny series (ATtiny13, ATtiny45, ATtiny85, etc.). This compatibility makes the STK500 a versatile tool for developing projects based on AVR microcontrollers.
Features of the STK500
The STK500 offers a host of features that make it an attractive choice for AVR microcontroller development:
-
Built-in In-System Programmer (ISP): The STK500 has a built-in ISP that allows you to program AVR chips directly on the board. This eliminates the need for an external programmer, simplifying the programming process.
-
Compatibility with a wide range of AVR microcontrollers: The STK500 supports various AVR microcontrollers, including the ATmega and ATtiny series. This compatibility ensures that you can use the board for a diverse range of projects.
-
RS-232 interface: The board features an RS-232 interface, which enables communication between the STK500 and a computer. This interface allows you to upload programs to the microcontroller and monitor the output using a serial terminal.
-
LCD and LED interfaces: The STK500 provides interfaces for connecting an LCD and LEDs, making it easy to create projects with visual output.
-
Analog and digital I/O: The board offers both analog and digital input/output pins, allowing you to connect various sensors and actuators to your projects.
-
Expansion headers: The STK500 features expansion headers that enable you to connect additional modules or custom circuits to the board, further extending its capabilities.

Benefits of using the STK500
Using the STK500 for AVR microcontroller development offers several benefits:
-
Easy to set up and use: The STK500 is designed to be user-friendly, with a straightforward setup process and intuitive software tools. This makes it accessible to both beginners and experienced users.
-
Time-saving: With the built-in ISP, you can program AVR microcontrollers directly on the board, saving time and effort compared to using an external programmer.
-
Cost-effective: The STK500 is a cost-effective solution for AVR microcontroller development, as it eliminates the need for additional hardware components.
-
Versatility: The board’s compatibility with a wide range of AVR microcontrollers and the availability of expansion headers make it suitable for a variety of projects, from simple blinking LEDs to complex embedded systems.
-
Educational value: The STK500 is an excellent learning tool for those new to microcontroller programming. It provides a hands-on experience and allows users to gain practical skills in embedded systems development.

Applications of the STK500
The STK500 can be used in a wide range of applications, including:
-
Learning and education: The board is an ideal platform for learning about microcontroller programming and embedded systems. It is often used in educational settings, such as schools and universities, to teach students the fundamentals of AVR microcontroller development.
-
Prototyping and testing: The STK500 is an excellent tool for prototyping and testing AVR-based projects. Its ease of use and versatility allow developers to quickly iterate on their designs and validate their ideas.
-
Hobby projects: Many hobbyists use the STK500 to create various projects, such as robots, home automation systems, and interactive art installations. The board’s compatibility with a wide range of AVR microcontrollers and the availability of expansion headers make it suitable for a diverse range of hobby projects.
-
Industrial applications: The STK500 can also be used in industrial settings for developing and testing AVR-based embedded systems. Its reliability and robustness make it suitable for use in harsh environments.

Getting started with the STK500
To start using the STK500, you’ll need to follow these steps:
-
Set up the hardware: Connect the STK500 to your computer using a USB cable. Ensure that the board is powered on and that the appropriate jumpers are set for your target AVR microcontroller.
-
Install the software: Download and install the Atmel Studio integrated development environment (IDE) on your computer. This software includes the necessary tools for programming and debugging AVR microcontrollers.
-
Write your code: Use the Atmel Studio IDE to write your code in C or Assembly language. You can also use libraries and example projects provided by Atmel to help you get started.
-
Compile and upload: Once your code is written, compile it using the Atmel Studio IDE. Then, use the built-in ISP to upload the compiled code to the target AVR microcontroller on the STK500 board.
-
Test and debug: Use the debugging features of the Atmel Studio IDE to test and debug your code. You can set breakpoints, step through your code, and monitor variables to identify and fix any issues.
Tips for using the STK500 effectively
To make the most of your STK500 and ensure a smooth development process, consider the following tips:
-
Read the documentation: Make sure to read the STK500 user manual and the datasheet for your target AVR microcontroller. These documents provide valuable information on the board’s features, pinout, and programming guidelines.
-
Start with example projects: Atmel provides a range of example projects that demonstrate how to use the STK500 with various AVR microcontrollers. These projects can serve as a starting point for your own development and help you understand the basics of AVR programming.
-
Use libraries and frameworks: Take advantage of the available libraries and frameworks for AVR development, such as the AVR Libc and the Arduino framework. These resources can save you time and effort by providing pre-written code for common tasks.
-
Keep your code organized: As your projects grow in complexity, it’s essential to keep your code organized and well-documented. Use meaningful variable and function names, and comment your code to make it easier to understand and maintain.
-
Regularly backup your work: Make sure to regularly backup your code and project files to avoid losing your work in case of hardware or software issues.
Frequently Asked Questions (FAQ)
-
Can I use the STK500 with non-Atmel microcontrollers?
No, the STK500 is designed specifically for Atmel AVR microcontrollers and is not compatible with other brands of microcontrollers. -
Do I need any additional hardware to use the STK500?
No, the STK500 is a self-contained development board that includes everything you need to program and debug AVR microcontrollers. However, you may need additional components, such as sensors or actuators, for your specific projects. -
Can I use the STK500 with the Arduino IDE?
While the STK500 is not directly compatible with the Arduino IDE, you can use the Arduino framework with the board by configuring the Atmel Studio IDE to work with Arduino libraries and boards. -
Is the STK500 suitable for advanced users?
Yes, the STK500 is suitable for both beginners and advanced users. Its versatility and expansion capabilities make it a valuable tool for experienced developers working on complex projects. -
Where can I find more resources and support for the STK500?
Atmel (now Microchip Technology) provides extensive documentation, example projects, and support forums for the STK500. You can find these resources on their official website. Additionally, there are many online communities, such as Arduino forums and AVR-related websites, where you can find helpful information and connect with other STK500 users.
Conclusion
The STK500 is a powerful and versatile development board for programming Atmel AVR microcontrollers. Its ease of use, compatibility with a wide range of AVR chips, and expansion capabilities make it an excellent choice for hobbyists, students, and professionals alike. Whether you’re learning about microcontroller programming, prototyping a new project, or developing an industrial embedded system, the STK500 provides a reliable and efficient platform for your development needs.
By following the steps outlined in this article and leveraging the available resources and support, you can quickly get started with the STK500 and unlock the full potential of AVR microcontroller development. So, whether you’re a beginner or an experienced developer, the STK500 is a great way to program microcontrollers and bring your ideas to life.
| Feature | Description |
|---|---|
| Built-in ISP | Allows programming AVR microcontrollers directly on the board without an external programmer |
| AVR compatibility | Supports a wide range of Atmel AVR microcontrollers, including ATmega and ATtiny series |
| RS-232 interface | Enables communication between the STK500 and a computer for programming and monitoring |
| LCD and LED interfaces | Provides interfaces for connecting an LCD and LEDs for visual output in projects |
| Analog and digital I/O | Offers both analog and digital input/output pins for connecting sensors and actuators |
| Expansion headers | Allows connecting additional modules or custom circuits to extend the board’s capabilities |
Table 1: Key features of the STK500 development board
| Application | Description |
|---|---|
| Learning and education | An ideal platform for learning about microcontroller programming and embedded systems |
| Prototyping and testing | Allows developers to quickly iterate on their designs and validate their ideas |
| Hobby projects | Suitable for a diverse range of hobby projects, such as robots, home automation, and interactive art |
| Industrial applications | Can be used in industrial settings for developing and testing AVR-based embedded systems |
Table 2: Applications of the STK500 development board


Leave a Reply