Introduction to SG90 Servo Motors
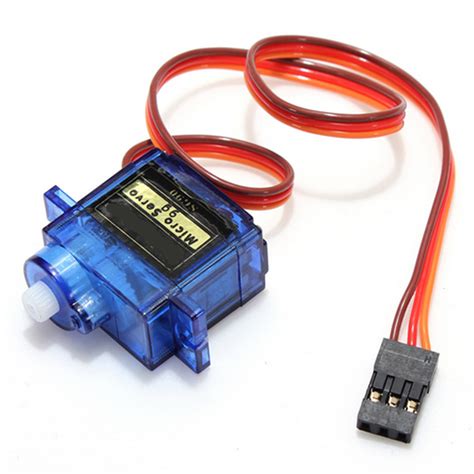
SG90 servo motors are a popular choice for hobbyists and professionals alike due to their small size, low cost, and ease of use. These mini-size motors are commonly used in robotics, RC vehicles, and other applications where precise control of angular position is required.
In this article, we will explore the basics of SG90 servo motors, their specifications, and how to control them using an Arduino board. We will also provide step-by-step instructions and example code to help you get started with your own servo projects.
What is a Servo Motor?
A servo motor is a type of motor that allows for precise control of angular position. Unlike regular DC motors, which rotate continuously when powered, servo motors can be commanded to rotate to a specific angle and hold that position until instructed otherwise.
Servo motors consist of several key components:
- DC motor
- Gearbox
- Potentiometer
- Control circuit
The DC motor is responsible for generating the torque needed to rotate the servo’s output shaft. The gearbox reduces the motor’s speed and increases its torque, allowing for more precise control. The potentiometer acts as a position sensor, providing feedback to the control circuit about the current angle of the output shaft. The control circuit compares the desired position (sent via a control signal) with the actual position (from the potentiometer) and adjusts the motor’s power accordingly.
SG90 Servo Specifications
The SG90 servo is a popular choice due to its compact size, low cost, and reliable performance. Here are the key specifications of the SG90 servo:
| Specification | Value |
|---|---|
| Operating Voltage | 4.8V – 6V |
| Torque | 1.8 kg·cm (4.8V), 2.2 kg·cm (6V) |
| Speed | 0.1 sec/60° (4.8V), 0.08 sec/60° (6V) |
| Rotation Range | 180° (90° in each direction) |
| Gear Type | Plastic |
| Dimensions | 22.2 x 11.8 x 31 mm |
| Weight | 9 g |
These specifications make the SG90 servo suitable for a wide range of applications, particularly those where size and weight are important factors.
Controlling SG90 Servos with Arduino
Required Components
To control an SG90 servo using an Arduino, you will need the following components:
- Arduino board (e.g., Arduino Uno)
- SG90 servo motor
- Jumper wires
- Breadboard (optional)
Wiring the SG90 Servo to Arduino
Connect the SG90 servo to your Arduino board as follows:
- Connect the servo’s red wire (VCC) to the Arduino’s 5V pin.
- Connect the servo’s brown or black wire (GND) to the Arduino’s GND pin.
- Connect the servo’s orange or yellow wire (signal) to one of the Arduino’s digital pins (e.g., pin 9).
If using a breadboard, you can use jumper wires to make the connections between the servo and the Arduino.
Arduino Servo Library
To simplify the process of controlling servos with Arduino, you can use the built-in Servo library. This library provides an easy-to-use interface for controlling servos without needing to generate the control signals manually.
To use the Servo library, follow these steps:
- Open the Arduino IDE.
- Navigate to Sketch > Include Library > Servo.
- The Servo library should now be included in your sketch.
Example Code: Controlling a Single SG90 Servo
Here’s an example sketch that demonstrates how to control a single SG90 servo using Arduino and the Servo library:
#include <Servo.h>

Servo myservo;  // create servo object to control a servo
int pos = 0;    // variable to store the servo position

void setup() {
  myservo.attach(9);  // attaches the servo on pin 9 to the servo object
}

void loop() {
  for (pos = 0; pos <= 180; pos += 1) { // goes from 0 degrees to 180 degrees
    myservo.write(pos);                 // tell servo to go to position in variable 'pos'
    delay(15);                          // waits 15ms for the servo to reach the position
  }
  for (pos = 180; pos >= 0; pos -= 1) { // goes from 180 degrees to 0 degrees
    myservo.write(pos);                 // tell servo to go to position in variable 'pos'
    delay(15);                          // waits 15ms for the servo to reach the position
  }
}
This sketch does the following:
- Includes the Servo library.
- Creates a Servo object called
myservo. - In the
setup()function, attaches the servo to digital pin 9 usingmyservo.attach(9). - In the
loop()function, twoforloops are used to sweep the servo back and forth: - The first loop moves the servo from 0° to 180° in 1° increments, with a 15ms delay between each step.
- The second loop moves the servo from 180° back to 0° in 1° increments, with a 15ms delay between each step.
Upload this sketch to your Arduino board, and you should see the SG90 servo sweeping back and forth continuously.
Example Code: Controlling Multiple SG90 Servos
You can control multiple SG90 servos using a single Arduino board. Here’s an example sketch that demonstrates how to control two servos independently:
#include <Servo.h>

Servo servo1;  // create servo object to control the first servo
Servo servo2;  // create servo object to control the second servo

int pos1 = 0;  // variable to store the position for the first servo
int pos2 = 0;  // variable to store the position for the second servo

void setup() {
  servo1.attach(9);  // attaches the first servo on pin 9 to the servo object
  servo2.attach(10); // attaches the second servo on pin 10 to the servo object
}

void loop() {
  for (pos1 = 0, pos2 = 180; pos1 <= 180; pos1 += 1, pos2 -= 1) {
    servo1.write(pos1);  // tell the first servo to go to position in variable 'pos1'
    servo2.write(pos2);  // tell the second servo to go to position in variable 'pos2'
    delay(15);           // waits 15ms for the servos to reach their positions
  }
  for (pos1 = 180, pos2 = 0; pos1 >= 0; pos1 -= 1, pos2 += 1) {
    servo1.write(pos1);  // tell the first servo to go to position in variable 'pos1'
    servo2.write(pos2);  // tell the second servo to go to position in variable 'pos2'
    delay(15);           // waits 15ms for the servos to reach their positions
  }
}
This sketch is similar to the previous example, but with the following changes:
- Two Servo objects (
servo1andservo2) are created to control two servos independently. - The servos are attached to digital pins 9 and 10 using
servo1.attach(9)andservo2.attach(10)in thesetup()function. - In the
loop()function, twoforloops are used to sweep the servos in opposite directions: - The first loop moves
servo1from 0° to 180° andservo2from 180° to 0° simultaneously. - The second loop moves
servo1from 180° to 0° andservo2from 0° to 180° simultaneously.
Upload this sketch to your Arduino board, and you should see the two SG90 servos sweeping in opposite directions continuously.

Applications of SG90 Servos
SG90 servos are versatile and can be used in a wide range of projects. Some common applications include:
- Robotics: SG90 servos are often used in robotic arms, legs, and grippers to provide precise movement and positioning.
- RC vehicles: These servos can be used to control steering, throttle, and other functions in remote-controlled cars, boats, and planes.
- Camera mounts: SG90 servos can be used to create pan-tilt camera mounts for surveillance, photography, or videography.
- Animatronics: In animatronic projects, SG90 servos can be used to create realistic movements for characters or creatures.
- Home automation: These servos can be used in home automation projects to control things like door locks, window blinds, or ventilation systems.

Troubleshooting
If you encounter issues while working with SG90 servos and Arduino, here are some common problems and their solutions:
- Servo not moving: Check your wiring connections, ensure that the servo is properly powered, and verify that your code is correct.
- Servo jittering or buzzing: This can be caused by insufficient power supply. Ensure that your power source can provide enough current for the servo. You can also try using a separate power supply for the servo, rather than drawing power from the Arduino board.
- Servo not reaching the desired position: Verify that your servo is capable of reaching the desired angle (the SG90 has a 180° range). Also, check that your code is sending the correct position values to the servo.
- Servo moving slowly or weakly: This can be caused by low battery voltage or a damaged servo. Check your power supply and replace the servo if necessary.

Frequently Asked Questions (FAQ)
-
What is the difference between a servo motor and a regular DC motor?
A servo motor is designed for precise position control, while a regular DC motor is designed for continuous rotation. Servo motors have built-in circuitry that allows them to receive a control signal and move to a specific angle, while DC motors rotate continuously when powered. -
Can I use an external power supply for the SG90 servo?
Yes, you can use an external power supply for the SG90 servo. This is recommended when using multiple servos or when your project requires more power than the Arduino board can provide. Just ensure that the power supply is within the servo’s operating voltage range (4.8V – 6V). -
How do I control the speed of the SG90 servo?
The speed of the SG90 servo is determined by the time it takes to move from one position to another. To control the speed, you can adjust the delay between each position change in your code. A shorter delay will result in faster movement, while a longer delay will result in slower movement. -
Can I use the SG90 servo for continuous rotation?
No, the SG90 servo is designed for position control and has a limited rotation range of 180°. If you need continuous rotation, you should use a continuous rotation servo or a regular DC motor. -
How do I control the SG90 servo using a potentiometer?
To control the SG90 servo using a potentiometer, connect the potentiometer to an analog input pin on your Arduino board. Read the potentiometer value usinganalogRead(), map the value to the servo’s angle range (0-180), and write the mapped value to the servo usingservo.write(). This allows you to control the servo position by adjusting the potentiometer.
Conclusion
SG90 servo motors are a great choice for projects that require precise position control in a small form factor. By using an Arduino board and the Servo library, you can easily control these servos and incorporate them into your projects.
This article has covered the basics of SG90 servos, including their specifications, how to wire them to an Arduino, and example code for controlling single and multiple servos. We’ve also discussed some common applications and troubleshooting tips.
With this knowledge, you should be well-equipped to start using SG90 servos in your own projects. Remember to experiment, be creative, and have fun!


Leave a Reply