Introduction to STM32 Microcontrollers
STM32 is a family of 32-bit microcontroller integrated circuits by STMicroelectronics. These microcontrollers are based on the ARM Cortex-M processor cores and offer a wide range of performance, features, and peripherals. STM32 microcontrollers are widely used in various applications such as automotive, industrial, medical, and consumer electronics due to their high performance, low power consumption, and rich set of peripherals.
Key Features of STM32 Microcontrollers
- 32-bit ARM Cortex-M processor cores (Cortex-M0, Cortex-M0+, Cortex-M3, Cortex-M4, Cortex-M7)
- Wide range of operating frequencies (up to 480 MHz)
- Low power consumption
- Rich set of peripherals (ADC, DAC, TIM, UART, I2C, SPI, CAN, USB, Ethernet, etc.)
- Various package options (LQFP, BGA, UFQFPN, WLCSP)
- Extensive software support (STM32Cube, CMSIS, FreeRTOS, mbed OS)
STM32 Pinout Overview
The STM32 pinout varies depending on the specific microcontroller series and package. However, most STM32 microcontrollers share common pin functions and naming conventions. In this section, we will discuss the general pinout structure and pin functions of STM32 microcontrollers.
Power Supply and Ground Pins
STM32 microcontrollers require a stable power supply to operate properly. The power supply pins are typically labeled as:
- VDD: Positive supply voltage
- VSS: Ground
- VBAT: Backup battery supply for RTC and backup registers
- VDDA: Analog supply voltage for ADC and DAC
- VSSA: Analog ground
It is essential to provide a clean and stable power supply to these pins to ensure reliable operation of the microcontroller.
Reset and Boot Pins
STM32 microcontrollers have dedicated pins for reset and boot control:
- NRST: Active-low reset input
- BOOT0: Boot memory selection pin
- BOOT1: Boot memory selection pin (available on some devices)
The BOOT0 and BOOT1 pins are used to select the boot memory source (Flash, SRAM, or System Memory) during the device startup.
Clock Pins
STM32 microcontrollers require clock sources for their operation. The common clock pins are:
- HSE: High-speed external clock input
- HSI: High-speed internal clock output
- LSE: Low-speed external clock input
- LSI: Low-speed internal clock output
The HSE and LSE pins are used to connect external Crystal Oscillators, while the HSI and LSI pins provide internal clock sources.
GPIO Pins
General-purpose input/output (GPIO) pins are the most abundant type of pins on STM32 microcontrollers. These pins can be configured as digital inputs, digital outputs, or alternate functions (e.g., UART, I2C, SPI, etc.). The GPIO pins are typically labeled as:
- PA0-PA15: GPIO Port A
- PB0-PB15: GPIO Port B
- PC0-PC15: GPIO Port C
- PD0-PD15: GPIO Port D
- PE0-PE15: GPIO Port E
- PF0-PF15: GPIO Port F
- PG0-PG15: GPIO Port G
- PH0-PH15: GPIO Port H
Each GPIO pin can be configured independently, and its function can be selected through the microcontroller’s peripheral registers.
Alternate Function Pins
In addition to the GPIO functionality, many STM32 pins can be configured for alternate functions. These alternate functions include:
- UART/USART: Universal Asynchronous Receiver-Transmitter
- I2C: Inter-Integrated Circuit
- SPI: Serial Peripheral Interface
- CAN: Controller Area Network
- USB: Universal Serial Bus
- Ethernet: Ethernet communication
- TIM: Timer input/output
- ADC: Analog-to-Digital Converter
- DAC: Digital-to-Analog Converter
The alternate function pins are typically shared with the GPIO pins, and their function can be selected through the microcontroller’s peripheral registers.

STM32 Pin Configuration
To use the STM32 microcontroller effectively, it is essential to understand how to configure its pins for the desired functionality. In this section, we will discuss the pin configuration process and provide examples using the STM32CubeMX tool and the STM32 HAL library.
Pin Configuration using STM32CubeMX
STM32CubeMX is a graphical tool provided by STMicroelectronics that allows users to easily configure STM32 microcontrollers. It provides a user-friendly interface for pin configuration, clock setup, and peripheral initialization. To configure pins using STM32CubeMX:
- Select the STM32 microcontroller series and package
- Configure the clock sources and frequencies
- Select the desired pin functions from the pinout view
- Configure the pin parameters (e.g., GPIO mode, pull-up/pull-down, output speed)
- Generate the initialization code for the selected configuration
STM32CubeMX generates a set of C files containing the initialization code for the configured peripherals and pins. These files can be integrated into the user’s project and further customized if needed.
Pin Configuration using STM32 HAL Library
The STM32 HAL (Hardware Abstraction Layer) library provides a set of APIs for configuring and controlling the STM32 peripherals. To configure pins using the STM32 HAL library:
- Include the necessary header files for the GPIO and RCC peripherals
- Define the GPIO port and pin using the GPIO_TypeDef and uint16_t data types
- Configure the GPIO pin using the HAL_GPIO_Init() function
- Set the GPIO pin state using the HAL_GPIO_WritePin() function
Here is an example code snippet for configuring a GPIO pin as an output and toggling its state:
/* Include necessary header files */
#include "stm32f4xx_hal.h"

/* Define GPIO port and pin */
#define LED_GPIO_PORT GPIOA
#define LED_PIN GPIO_PIN_5

int main(void)
{
  /* Initialize GPIO pin */
  GPIO_InitTypeDef GPIO_InitStruct;
  GPIO_InitStruct.Pin = LED_PIN;
  GPIO_InitStruct.Mode = GPIO_MODE_OUTPUT_PP;
  GPIO_InitStruct.Pull = GPIO_NOPULL;
  GPIO_InitStruct.Speed = GPIO_SPEED_FREQ_HIGH;
  HAL_GPIO_Init(LED_GPIO_PORT, &GPIO_InitStruct);

  while (1)
  {
    /* Toggle LED */
    HAL_GPIO_TogglePin(LED_GPIO_PORT, LED_PIN);
    HAL_Delay(500);
  }
}
This code configures PA5 as an output pin and toggles its state every 500 milliseconds.

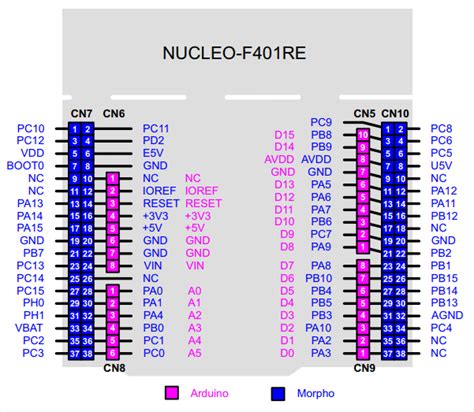
STM32 Pinout Tables
To help users quickly identify the pin functions and alternate functions of STM32 microcontrollers, manufacturers provide pinout tables. These tables list the pin numbers, pin names, and the available functions for each pin. Here are some examples of STM32 pinout tables:
STM32F103C8T6 (Blue Pill) Pinout Table
| Pin Number | Pin Name | Alternate Functions |
|---|---|---|
| 1 | VBAT | RTC battery backup |
| 2 | PC13 | GPIO, RTC_AF1 |
| 3 | PC14 | GPIO, RTC_AF2 |
| 4 | PC15 | GPIO, RTC_AF3 |
| 5 | PD0 | GPIO, CAN_RX |
| 6 | PD1 | GPIO, CAN_TX |
| 7 | NRST | Reset |
| 8 | VSSA | Analog ground |
| 9 | VDDA | Analog supply |
| 10 | PA0 | GPIO, ADC12_IN0 |
| … | … | … |
STM32F407VGT6 (Discovery Kit) Pinout Table
| Pin Number | Pin Name | Alternate Functions |
|---|---|---|
| 1 | VDD | Power supply |
| 2 | VSS | Ground |
| 3 | NRST | Reset |
| 4 | PA0 | GPIO, TIM2_CH1 |
| 5 | PA1 | GPIO, TIM2_CH2 |
| 6 | PA2 | GPIO, TIM2_CH3 |
| 7 | PA3 | GPIO, TIM2_CH4 |
| 8 | PA4 | GPIO, SPI1_NSS |
| 9 | PA5 | GPIO, SPI1_SCK |
| 10 | PA6 | GPIO, SPI1_MISO |
| … | … | … |
These tables provide a quick reference for the available pin functions and alternate functions, making it easier for users to design and implement their projects.

STM32 Pinout Design Considerations
When designing a system using STM32 microcontrollers, there are several pinout design considerations to keep in mind:
Power Supply and Ground
- Provide a stable and clean power supply to the VDD and VDDA pins
- Connect the VSS and VSSA pins to a solid ground plane
- Use decoupling capacitors near the power supply pins to reduce noise
Reset and Boot
- Connect the NRST pin to a reliable reset source (e.g., a reset button or a power-on reset circuit)
- Use pull-up or pull-down resistors on the BOOT0 and BOOT1 pins to select the desired boot mode
Clock Sources
- Choose appropriate clock sources (HSE, HSI, LSE, LSI) based on the system requirements
- Use external crystal oscillators for high-accuracy applications
- Consider the power consumption and startup time of the clock sources
GPIO and Alternate Functions
- Group pins with similar functions (e.g., UART, SPI, I2C) together for ease of routing
- Use appropriate GPIO configurations (e.g., pull-up/pull-down, output speed) for reliable operation
- Be mindful of the shared alternate functions when assigning pins
Electromagnetic Compatibility (EMC)
- Keep high-speed signals (e.g., clock, USB, Ethernet) away from sensitive analog signals
- Use proper grounding and shielding techniques to reduce electromagnetic interference (EMI)
- Follow the manufacturer’s guidelines for PCB layout and routing
By considering these factors during the pinout design phase, users can create robust and reliable systems using STM32 microcontrollers.
Frequently Asked Questions (FAQ)
- What is the difference between STM32 and Arduino?
-
STM32 is a family of 32-bit ARM Cortex-M microcontrollers, while Arduino is an open-source platform based on 8-bit AVR or 32-bit ARM microcontrollers. STM32 microcontrollers offer higher performance, more peripherals, and lower power consumption compared to Arduino boards.
-
Can I use the Arduino IDE with STM32 microcontrollers?
-
Yes, it is possible to use the Arduino IDE with STM32 microcontrollers by installing the STM32duino package. This package provides support for various STM32 boards and allows users to program them using the familiar Arduino syntax.
-
How do I select the appropriate STM32 microcontroller for my project?
-
When selecting an STM32 microcontroller, consider factors such as the required performance, memory size, number of peripherals, package type, and cost. STMicroelectronics provides a wide range of STM32 microcontrollers catering to different application requirements.
-
What is the purpose of the BOOT0 and BOOT1 pins?
-
The BOOT0 and BOOT1 pins are used to select the boot memory source during the device startup. By setting these pins to different states, users can choose to boot from Flash memory, SRAM, or System Memory.
-
How do I configure the clock sources for STM32 microcontrollers?
- The clock sources for STM32 microcontrollers can be configured using the STM32CubeMX tool or the STM32 HAL library. Users can select the desired clock sources (HSE, HSI, LSE, LSI) and set the appropriate clock frequencies based on their application requirements.
Conclusion
In this article, we have provided a comprehensive guide on the STM32 pinout. We discussed the STM32 microcontroller family, its key features, and the general pinout structure. We also covered the pin configuration process using STM32CubeMX and the STM32 HAL library, along with examples of pinout tables for popular STM32 boards. Finally, we highlighted important design considerations when working with STM32 pinouts.
By understanding the STM32 pinout and its associated concepts, users can effectively design and implement their projects using these powerful microcontrollers. With their high performance, rich peripheral set, and extensive software support, STM32 microcontrollers offer a versatile solution for a wide range of applications.


Leave a Reply