Introduction to CadSoft EAGLE
CadSoft EAGLE, which stands for “Easily Applicable Graphical Layout Editor,” was first released in 1988 by CadSoft Computer GmbH. The software has since been acquired by Autodesk, a leading provider of design and engineering software. EAGLE has gained popularity due to its user-friendly interface, extensive component libraries, and powerful automation features.
Key Features of CadSoft EAGLE
- Schematic Editor
- Create and edit electronic schematics
- Extensive component libraries
- Easy-to-use interface
-
Hierarchical design support
-
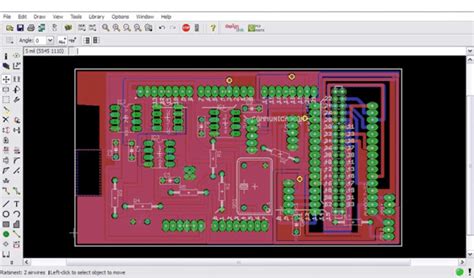
PCB Layout Editor
- Design single and multi-layer PCBs
- Automatic and manual routing options
- Real-time design rule checking (DRC)
-
3D visualization of PCB designs
-
Automation and Scripting
- User Language Programs (ULPs) for automation
- Scripting support for custom functionality
-
Integration with version control systems
-
Collaborative Design
- Multi-user support for team collaboration
- Design synchronization and version control
- Cloud-based storage and sharing options
Getting Started with CadSoft EAGLE V7
System Requirements
To run CadSoft EAGLE V7 effectively, your system should meet the following minimum requirements:
| Operating System | Processor | RAM | Display Resolution |
|---|---|---|---|
| Windows 7 or later | Intel Core i3 or equivalent | 4 GB | 1024 x 768 |
| macOS 10.11 or later | Intel Core i3 or equivalent | 4 GB | 1024 x 768 |
| Linux (64-bit) | Intel Core i3 or equivalent | 4 GB | 1024 x 768 |
Installation and Licensing
- Download the CadSoft EAGLE V7 installer from the official Autodesk website.
- Run the installer and follow the on-screen instructions to complete the installation process.
- Launch CadSoft EAGLE and choose the appropriate licensing option:
- Free version (limited features and board size)
- Subscription-based license (full access to all features)
- Perpetual license (one-time purchase with full access)

Designing Schematics in CadSoft EAGLE
Creating a New Schematic
- Open CadSoft EAGLE and select “New Project” from the File menu.
- Choose a project name and location, then click “OK.”
- In the Control Panel, right-click on the project name and select “New” > “Schematic.”
Adding Components to the Schematic
- Use the “Add” tool to search for and place components from the libraries.
- Customize component properties, such as value and package, using the “Properties” dialog.
- Arrange components on the schematic sheet for optimal readability and organization.
Connecting Components with Nets
- Use the “Net” tool to connect the pins of components.
- Assign meaningful names to nets using the “Name” tool.
- Create bus connections for groups of related signals using the “Bus” tool.
Checking the Schematic for Errors
- Run the Electrical Rule Check (ERC) to identify potential issues in the schematic.
- Review and address any warnings or errors reported by the ERC.
- Verify that the schematic accurately represents the intended circuit design.

Designing PCBs in CadSoft EAGLE
Creating a New PCB Layout
- With the schematic open, select “Switch to Board” from the File menu to create a new PCB layout.
- Define the board outline using the “Rectangle” or “Polygon” tools.
- Place mounting holes and other mechanical features as needed.
Placing Components on the PCB
- Use the “Move” tool to position components on the PCB.
- Rotate and mirror components as necessary to optimize placement and routing.
- Ensure proper spacing between components to meet manufacturing requirements.
Routing Traces and Vias
- Use the “Route” tool to manually route traces between component pads.
- Adjust trace width and clearance settings to meet signal integrity and manufacturability requirements.
- Place vias to connect traces on different layers of the PCB.
Applying Design Rules and Constraints
- Define design rules, such as minimum trace width and clearance, using the “Design Rules” dialog.
- Apply net classes to groups of nets with similar requirements.
- Use the “Autorouter” tool to automatically route traces based on the defined design rules.
Generating Manufacturing Files
- Run the Design Rule Check (DRC) to ensure the PCB layout meets all design rules.
- Generate Gerber files and drill files for PCB fabrication using the “CAM Processor.”
- Export the bill of materials (BOM) and assembly drawings for manufacturing and assembly.

Advanced Features and Techniques
Hierarchical Schematic Design
- Create hierarchical blocks to organize complex schematics into smaller, reusaBLE Modules.
- Use ports to define the inputs and outputs of hierarchical blocks.
- Instantiate hierarchical blocks in the top-level schematic for a modular design approach.
Scripting and Automation with ULPs
- Write User Language Programs (ULPs) using the built-in scripting language.
- Automate repetitive tasks, such as component placement and net labeling.
- Create custom design reports and data exports using ULPs.
Collaborative Design with Version Control
- Integrate CadSoft EAGLE with version control systems like Git or Subversion.
- Collaborate with team members by sharing project files through version control repositories.
- Manage design revisions and track changes using version control features.
Frequently Asked Questions (FAQ)
-
Q: What are the differences between CadSoft EAGLE and other EDA software?
A: CadSoft EAGLE is known for its user-friendly interface, extensive component libraries, and powerful scripting capabilities. It offers a balance between ease of use and advanced features, making it suitable for both beginners and experienced designers. -
Q: Can I use CadSoft EAGLE for commercial projects?
A: Yes, CadSoft EAGLE can be used for commercial projects. However, you will need to purchase a commercial license or subscription to access the full set of features and remove any restrictions on board size and layer count. -
Q: Is CadSoft EAGLE compatible with other EDA file formats?
A: CadSoft EAGLE supports importing and exporting various file formats, including Gerber, DXF, and ODB++. This allows for interoperability with other EDA software and manufacturing processes. -
Q: Can I create custom component libraries in CadSoft EAGLE?
A: Yes, CadSoft EAGLE allows you to create custom component libraries. You can design your own schematic symbols and PCB footprints, and organize them into libraries for easy access and reuse across projects. -
Q: What resources are available for learning CadSoft EAGLE?
A: Autodesk provides comprehensive documentation, tutorials, and video guides for learning CadSoft EAGLE. Additionally, there is a large community of users who share their knowledge through forums, blogs, and online tutorials. Joining user groups and attending workshops can also help you learn and master the software.
Conclusion
CadSoft EAGLE V7 is a powerful and user-friendly EDA software suite that enables engineers, hobbyists, and students to design high-quality electronic schematics and PCBs. With its intuitive interface, extensive component libraries, and advanced features like scripting and collaborative design, EAGLE has become a go-to choice for electronic design projects of all scales.
By following the steps outlined in this article, you can get started with CadSoft EAGLE V7 and begin creating professional-grade schematics and PCB layouts. Whether you are a beginner or an experienced designer, EAGLE offers the tools and flexibility to bring your electronic ideas to life.
As you continue to explore and utilize the capabilities of CadSoft EAGLE, remember to take advantage of the resources available, such as documentation, tutorials, and community support. With practice and dedication, you can master the art of electronic design and create innovative projects using this industry-standard software.


Leave a Reply