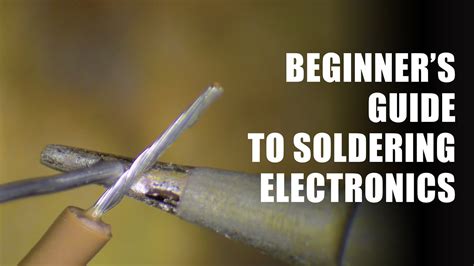
What is Soldering?
Soldering is a process that involves joining two or more metal components together by melting a filler metal (solder) between them. The solder, which has a lower melting point than the components being joined, forms a strong electrical and mechanical bond when it cools and solidifies.
Tools and Materials Required for Manual Soldering
Before you begin soldering, it’s essential to gather the necessary tools and materials. Here’s a list of items you’ll need:
Soldering Iron
A soldering iron is the most crucial tool for manual soldering. It consists of a heated metal tip that melts the solder and a handle that allows you to manipulate the tip. Soldering Irons come in various wattages, with higher wattages suitable for larger components or heavier-gauge wires. For most electronic projects, a 25-40 watt soldering iron will suffice.
Soldering Station
A soldering station is an advanced version of a soldering iron that offers temperature control and other features. While not essential for beginners, a soldering station can help you achieve more precise and consistent results, especially when working with sensitive components.
Solder
Solder is a metal alloy that typically consists of tin and lead. However, due to environmental and health concerns, lead-free solder alloys are becoming more common. When selecting solder, consider factors such as the diameter of the solder wire, the alloy composition, and the flux core type (more on flux later).
| Solder Type | Composition | Melting Point | Characteristics |
|---|---|---|---|
| Lead-based | 60% Tin, 40% Lead | 183-190°C (361-374°F) | Easy to work with, forms strong joints |
| Lead-free | Various alloys, e.g., 99.3% Tin, 0.7% Copper | 220-227°C (428-441°F) | Environmentally friendly, requires higher soldering temperatures |
Flux
Flux is a chemical compound that helps to remove oxides from metal surfaces and promote the flow of solder. It comes in various forms, such as paste, liquid, or as a core within the solder wire. Rosin-based fluxes are the most common type used in electronics soldering.
Soldering Wick
Soldering wick, also known as desoldering braid, is a copper wire mesh used to remove excess solder from joints or correct soldering mistakes. When heated with a soldering iron, the wick absorbs the molten solder, leaving the joint clean.
Safety Equipment
Soldering involves high temperatures and potential exposure to fumes, so it’s crucial to use appropriate safety equipment. This includes:
- Safety glasses to protect your eyes from solder splashes
- A well-ventilated workspace or a fume extractor to minimize exposure to soldering fumes
- Heat-resistant gloves or fingertips to protect your hands from burns
- A fire-resistant work surface, such as a soldering mat

Preparing for Soldering
Before you start soldering, follow these preparation steps to ensure a safe and successful experience:
-
Clean and tin the soldering iron tip: Apply a small amount of solder to the hot iron tip and wipe it on a damp sponge or brass wool to remove any oxidation and coat the tip with a thin layer of solder. This process is called tinning and helps to improve heat transfer and prolong the life of the tip.
-
Clean the components: Use isopropyl alcohol and a lint-free cloth to clean the surfaces of the components you’ll be soldering. This removes any dirt, grease, or oxidation that may hinder solder adhesion.
-
Secure the components: Use helping hands, a PCB Holder, or other clamping tools to hold the components in place while soldering. This frees up your hands to focus on manipulating the soldering iron and solder.
-
Apply flux (if necessary): If your solder doesn’t have a flux core or if you’re working with particularly oxidized components, apply a small amount of flux to the joint area to help the solder flow and adhere properly.

Basic Soldering Techniques
Now that you’re prepared, let’s dive into the basic techniques for manual soldering.
Through-Hole Soldering
Through-hole soldering involves joining components with leads that pass through holes in a printed circuit board (PCB). Here’s how to solder a through-hole joint:
- Insert the component leads through the corresponding holes in the PCB.
- Bend the leads slightly outward to hold the component in place.
- Heat the joint by placing the soldering iron tip against the pad and the component lead simultaneously. Apply heat for 2-3 seconds.
- Feed solder into the joint, allowing it to melt and flow around the lead and pad. Use just enough solder to create a small cone-shaped joint.
- Remove the solder and the iron tip, and let the joint cool without disturbing it.
Surface Mount Soldering
Surface mount soldering involves attaching components directly to the surface of a PCB without using through-holes. This technique requires more precision and skill than through-hole soldering. Here’s how to solder a surface mount joint:
- Apply a small amount of solder paste or flux to the pads on the PCB.
- Place the surface mount component on the pads, ensuring proper alignment.
- Heat the joint by placing the soldering iron tip against the pad and the component lead simultaneously. Apply heat for 1-2 seconds.
- Feed solder into the joint, allowing it to melt and flow around the lead and pad. Use just enough solder to create a small fillet between the component and the pad.
- Remove the solder and the iron tip, and let the joint cool without disturbing it.

Soldering Tips and Tricks
To achieve the best results when soldering, keep these tips and tricks in mind:
- Use the appropriate soldering iron tip size and shape for the job. A larger tip may be needed for heavier-gauge wires or larger components, while a smaller tip is better for precise work on small components.
- Maintain the proper soldering iron temperature. Too low, and the solder won’t flow properly; too high, and you risk damaging components or creating dry joints.
- Apply heat to the joint, not the solder. Let the joint melt the solder, not the iron tip.
- Avoid breathing in soldering fumes by working in a well-ventilated area or using a fume extractor.
- Inspect your solder joints visually and with a multimeter to ensure proper connections and conductivity.
Common Soldering Mistakes and How to Avoid Them
Even experienced solderers can make mistakes. Here are some common soldering errors and how to prevent them:
Cold Joints
A cold joint occurs when the solder doesn’t melt completely, resulting in a dull, cracked, or lumpy appearance. To avoid cold joints:
- Ensure the soldering iron is hot enough
- Apply heat to the joint for sufficient time
- Use fresh solder and clean components
Bridges
Solder bridges happen when excess solder accidentally connects adjacent pads or leads. To prevent bridges:
- Use just enough solder to create a proper joint
- Keep the soldering iron tip clean and well-tinned
- Use a soldering wick to remove excess solder
Overheated Components
Applying too much heat for too long can damage components. To avoid overheating:
- Use the lowest effective temperature for your soldering iron
- Apply heat for only as long as necessary
- Use heat sinks or thermal shunts to protect sensitive components
Desoldering Techniques
Sometimes, you may need to remove a soldered component or correct a mistake. Here are two common desoldering techniques:
Using a Soldering Wick
- Place the soldering wick on top of the solder joint you want to remove.
- Heat the wick with your soldering iron, allowing the solder to melt and be absorbed into the wick.
- Remove the iron and the wick, and let the joint cool.
- Repeat as necessary until the excess solder is removed.
Using a Desoldering Pump
- Heat the solder joint with your soldering iron until the solder melts.
- Quickly place the tip of the desoldering pump (also known as a solder sucker) near the molten solder and press the release button.
- The pump will create suction, drawing the molten solder away from the joint and into the pump.
- Release the pump’s plunger to eject the collected solder.
Frequently Asked Questions (FAQ)
- What is the difference between lead-based and lead-free solder?
-
Lead-based solder contains a mixture of tin and lead, typically in a 60/40 ratio. It has a lower melting point and is easier to work with than lead-free solder. However, due to environmental and health concerns, lead-based solder is being phased out in favor of lead-free alternatives. Lead-free solder is made from alloys of tin, copper, silver, and other metals, and requires higher soldering temperatures.
-
How do I choose the right soldering iron wattage?
-
The wattage of a soldering iron determines its heat output. For most electronic projects, a 25-40 watt soldering iron is sufficient. Higher wattage irons (50-100 watts) are better suited for heavy-duty tasks, such as soldering thick wires or large components. When in doubt, start with a lower wattage iron and upgrade if needed.
-
Can I use lead-free solder with a soldering iron designed for lead-based solder?
-
Yes, you can use lead-free solder with a standard soldering iron. However, keep in mind that lead-free solder requires higher melting temperatures, so you may need to adjust your iron’s temperature accordingly. Additionally, lead-free solder may require more frequent tip cleaning and maintenance due to its higher tin content.
-
How often should I clean my soldering iron tip?
-
Clean your soldering iron tip before and after each use, as well as periodically during extended soldering sessions. A clean tip ensures better heat transfer and prevents oxidation, which can lead to poor solder joints. Use a damp sponge or brass wool to wipe the tip clean, and re-tin the tip with fresh solder after cleaning.
-
What should I do if I accidentally create a solder bridge?
- If you create a solder bridge between two adjacent pads or leads, use a soldering wick to remove the excess solder. Place the wick on top of the bridge and heat it with your soldering iron. The molten solder will be absorbed into the wick, breaking the bridge. Alternatively, you can use a desoldering pump to suck up the excess solder.
Conclusion
Manual soldering is a valuable skill for anyone working with electronics. By understanding the tools, materials, and techniques involved, you can create strong, reliable solder joints and bring your projects to life. Remember to prioritize safety, practice regularly, and don’t be discouraged by initial mistakes – soldering mastery comes with experience. Happy soldering!


Leave a Reply